Do you know how to add a new Connection URL or Edit an existing Connection URL in Planning Analytics for Excel? Here are the steps to follow:
Adding a Connection URL
Once Planning Analytics for Excel has been launched, go into the IBM Planning Analytics ribbon click on the “Connect” button. Click the “New Connection” button within the drop down menu.

The following window will appear.
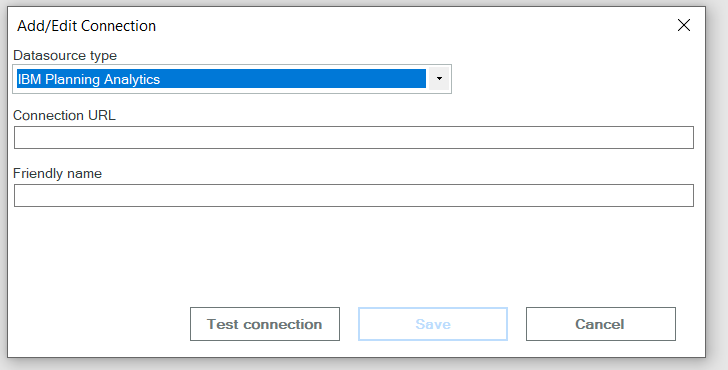
Datasource type – This is a dropdown containing two selections: IBM Planning Analytics and IBM Cognos Analytics. For this example, we are connecting to IBM Planning Analytics.
Connection URL – The connection URL connects Planning Analytics for Excel to a Planning Analytics Workspace server. If you are connecting to a local installation of Planning Analytics Workspace, this will contain either the IP address of your Planning Analytics Workspace server or the machine name of your Planning Analytics Workspace server, examples could look as follows:
-
If you are connecting to an IBM Cloud Planning Analytics Workspace Server, the connection URL would look something like this:
- https://mycompanyname.planning-analytics.ibmcloud.com/
Friendly name – The friendly name is a user defined setting in the sense that you give it a name that people within the organization would recognize, and it would be something meaningful to them, an example could be:
- mycompanyname DEV Server
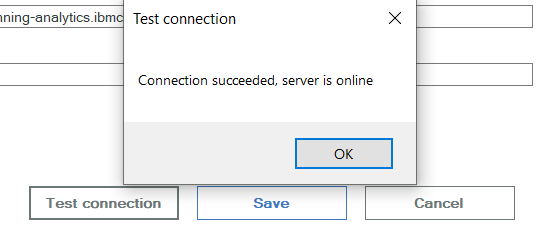
Once the information is entered, press the Test Connection button to confirm your connection. A successful connection will result in the following message:
Once completed, click the “Save” button.
Editing a Connection URL
Occasionally you may need to edit an existing connection URL. This may entail a change to your internal “Friendly name” or a change to the IP address of the server. Here are the steps to follow:
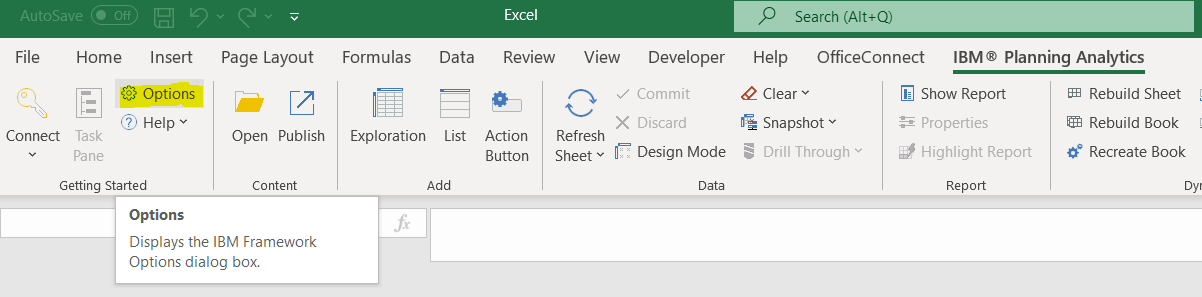
Once Planning Analytics for Excel has been launched, go into the IBM Planning Analytics ribbon click on the “Options” button.
Click on the option for “IBM” on the left-hand side of the window.
You will see a list of all your existing connections. Select the connection you want to edit and click the “Edit” button at the bottom of the screen. You can then make the necessary adjustments and retest the connection.
Revelwood has worked with IBM Planning Analytics / TM1 for more than 27 years. We’ve partnered with hundreds of companies on the design, development, maintenance and updates of IBM Planning Analytics applications, across every industry. Have a challenge with Planning Analytics / TM1? We can help you!
Read more IBM Planning Analytics Tips & Tricks:
IBM Planning Analytics Tips & Tricks: Excel’s XMATCH Function
IBM Planning Analytics Tips & Tricks: Adding a New Entry to Index Cube via Dynamic Report