• Skip to main content
  • Skip to footer
Revelwood Logo

Revelwood

Your SUPER-powered WP Engine Site

  • Who We Are
    • About Us
      • Our Company
      • Our Team
      • Partners
    • Careers
      • Join Our Team
  • What We Do
    • Solutions
      • Workday Adaptive Planning
      • IBM Planning Analytics
      • BlackLine
    • Services
      • Implementation Services
      • Customer Care
        • Help Desk
        • System Administration as a Service
      • Training
        • Adaptive Planning Training
        • IBM Planning Analytics / TM1 Training
    • Products
      • DataMaestro
      • LightSpeed
      • IBM Planning Analytics Utilities
  • How We Help
    • Workday Adaptive Planning Use Cases
    • IBM Planning Analytics Use Cases
    • BlackLine Use Cases
    • Client Success Stories
  • How We Think
    • Knowledge Center
    • Events
    • News
  • Contact Us

Workday Adaptive Planning Tips & Tricks

Workday Adaptive Planning Tips & Tricks: Data Integration and the Planning Data Source


August 17, 2022

By Marc Assenza

Did you know that Workday Adaptive Planning integrations can use the metadata in Adaptive Planning as a part of the integration?

It’s true! The process requires setting up the credential and setting up a data source for Adaptive Planning. You must have the proper credentials yourself within Adaptive Planning to set this up.

To set up the credential you will need to do the following:

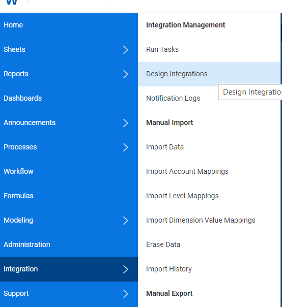
From the Workday navigation button, go to Integration🡪Design Integrations

Graphical user interface, application

Description automatically generated

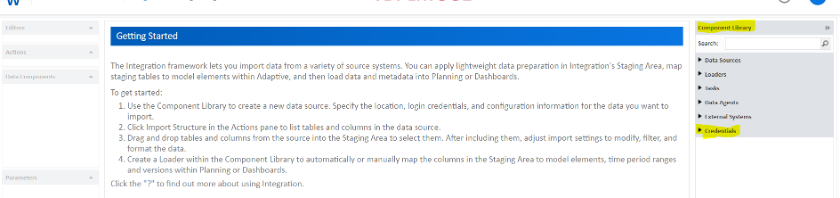
You will arrive at the following screen. Under the Component Library section click on the Credentials option.

Graphical user interface, text, application, Word

Description automatically generated

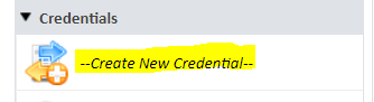
From the list that is presented, the first option is to Create a new Credential, select this.

Graphical user interface

Description automatically generated with medium confidence

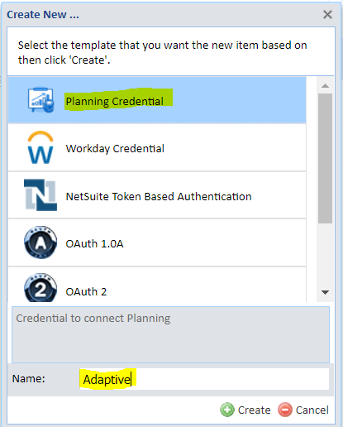
Once clicked, the following list will be presented, select Planning Credential, and give it a name. Giving it a name that is meaningful matters, Adaptive certainly fits the bill here.

Graphical user interface, application

Description automatically generated

Once created, you will see that your credential exists under credentials in the Component Pane, but no access to the data source has been granted yet because no authorized user has been assigned. To assign an authorized user (a user with the rights to perform all these steps) to the credentials, you follow the on-screen instructions and click “Authorize” under the Actions panel.

Graphical user interface, application

Description automatically generated

When you click authorize, the following appears, enter the credentials in the pop-up screen and click “Authorize” on the lower right-hand portion of the screen.

Graphical user interface, text, application, email

Description automatically generated

Next you will want to click the Save button to save the login information with the credential.

Graphical user interface, application

Description automatically generated

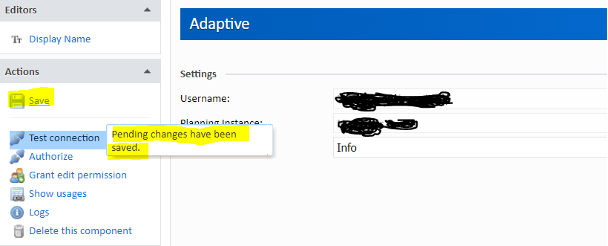
The next step will be to Test the connection. This is done by clicking on “Test Connection” under the Actions pane. A pop-up window will display, click on “Test.” If the login credentials are valid, the following window will appear and the credential is all set up.

Graphical user interface, application

Description automatically generated

To set up the data source, you will need to do the following:

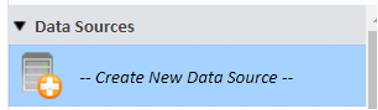
Under the Component Library, click on Data Sources.

Graphical user interface, text, application, Word

Description automatically generated

Click on the option “Create New Data Source.”

Graphical user interface, text, application, table, email

Description automatically generated

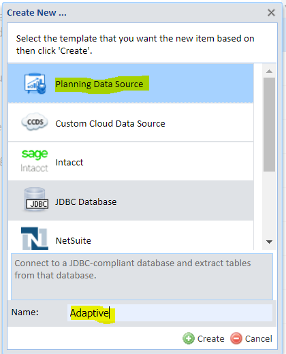
Here again select Planning Data Source and give it a meaningful name, keeping the name the same in this example and calling it Adaptive.

Graphical user interface, application

Description automatically generated

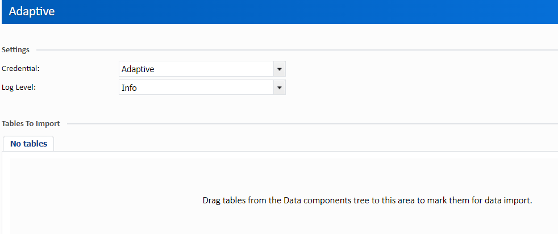
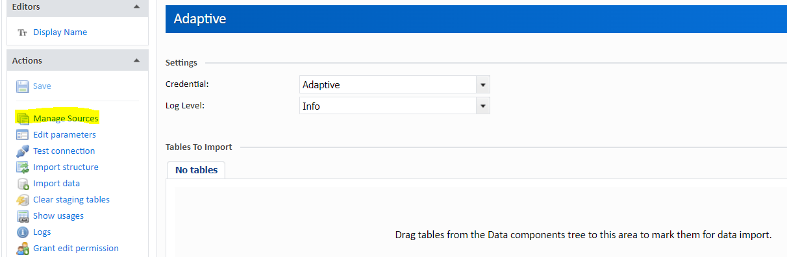
Once the Data Source is created, the following screen will appear. Here you will assign the Data Source the Credential that was created in step 1 and save it.

Graphical user interface, application, Teams

Description automatically generated
A picture containing Word

Description automatically generated

You will notice that no tables have appeared. That is because we have not defined them yet.

Graphical user interface, text, application, email

Description automatically generated

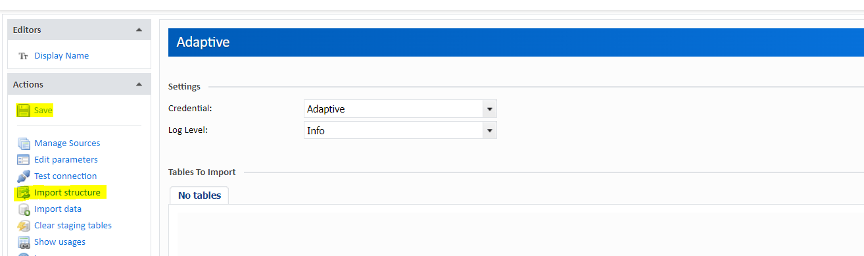
On the left-hand side under Actions, click on “Manage Sources.”

Graphical user interface, text, application, email

Description automatically generated

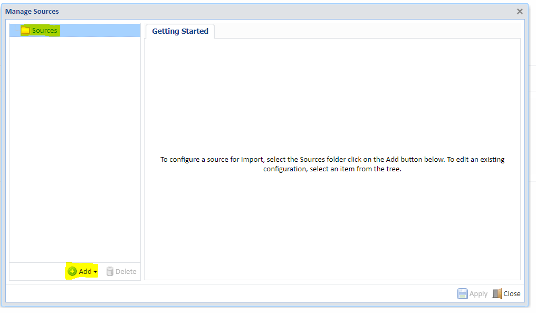
The following popup window will appear, click on the sources folder first, then click on the Add button.

Graphical user interface, text, application, email

Description automatically generated

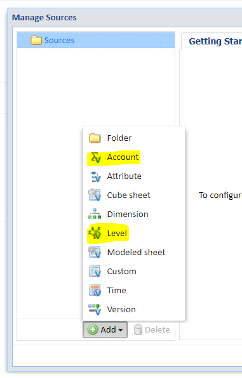
You will now see a list; in the example we will import metadata about Accounts and Levels. Those two will be selected.

Graphical user interface, application

Description automatically generated

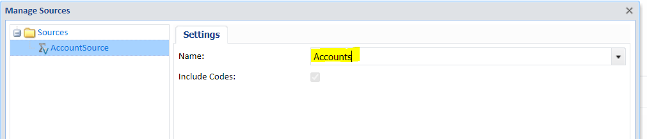
You have the option to rename the source, so Accounts and Levels will be used in place of the default name.

Graphical user interface, application

Description automatically generated
Graphical user interface, text, application

Description automatically generated

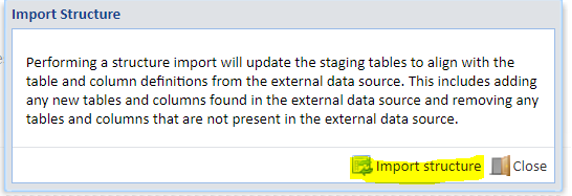
No tables are in the Data Source yet because the Data Source needs to be saved and the structure needs to be imported. Click the Save option first followed by “Import Structure.”

Graphical user interface, text, application

Description automatically generated
Graphical user interface, text, application

Description automatically generated
Graphical user interface, text, application

Description automatically generated

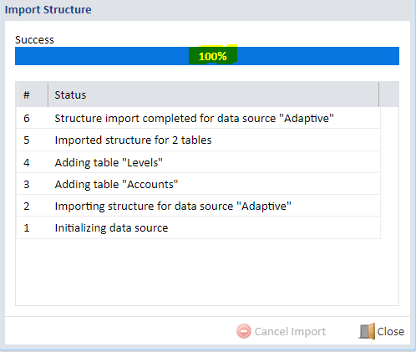
The table structures are now present as seen below.

Graphical user interface, text, application

Description automatically generated

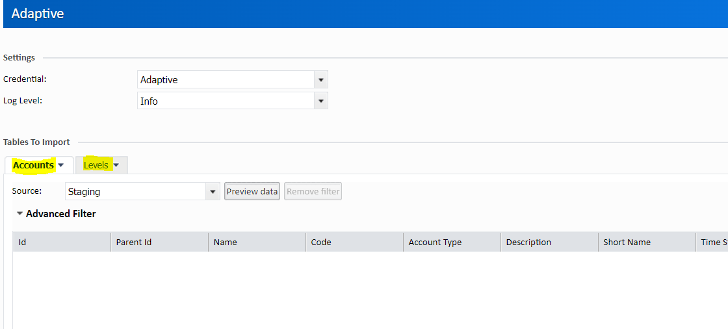
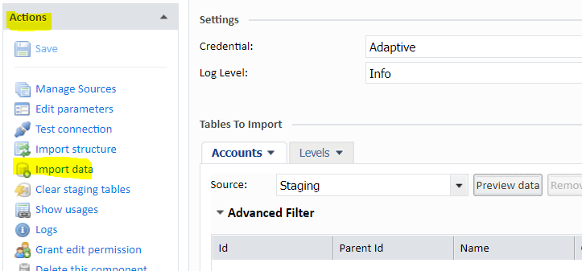
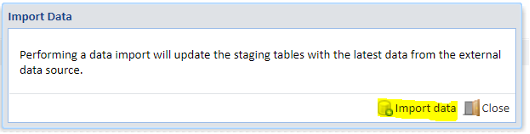
The next step is to import the data, this is done by clicking “Import Data” under the Actions pane.

Graphical user interface, text, application

Description automatically generated
Graphical user interface, text, application

Description automatically generated
Graphical user interface, text, application

Description automatically generated

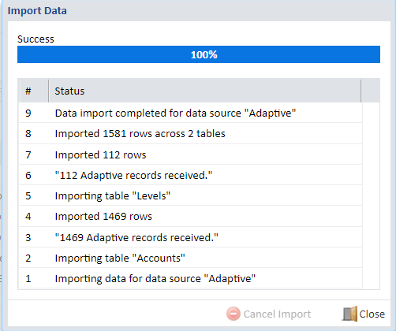
That’s all it takes to set up the credential and the Adaptive Data Source, now you’re ready to utilize it in the Staging area for integration however you see fit!

Visit Revelwood’s Knowledge Center for our Workday Adaptive Planning Tips & Tricks or sign up here to get our Workday Adaptive Planning Tips & Tricks delivered directly to your inbox. Not sure where to start with Workday Adaptive Planning? Our team here at Revelwood can help! Contact us info@revelwood.com for more information.

Read more Workday Adaptive Planning Tips & Tricks:

Workday Adaptive Planning Tips & Tricks: Revenue Cohort Modeling

Workday Adaptive Planning Tips & Tricks: Check Boxes in Modeled Sheets

Workday Adaptive Planning Tips & Tricks: Show Actuals for Linked Accounts

Author

  • Marc Assenza
    Marc Assenza

    View all posts

    • Categories

      • Awards & Recognition
      • Financial Close & Consolidation
      • FP&A Done Right
      • IBM Planning Analytics Tips & Tricks
      • News & Events
      • Success Stories
      • Tech Bulletins
      • Workday Adaptive Planning Insights
      • Workday Adaptive Planning Tips & Tricks

    Popular Posts

    Authors

    Adam Riskin
    Adam Riskin
    Ailenette Cruz
    Ailenette Cruz
    Alex Goldman
    Alex Goldman
    Ben Alcock
    Ben Alcock
    Brian Combs
    Brian Combs
    Dave Miersch
    Dave Miersch
    Dillon Rossman
    Dillon Rossman
    Gary Leiffer
    Gary Leiffer
    John Pra Sisto
    John Pra Sisto
    Ken Wolf
    Ken Wolf
    Koury Reid
    Koury Reid
    Lee Lazarow
    Lee Lazarow
    Lisa Minneci
    Lisa Minneci
    Marc Assenza
    Marc Assenza
    Mary Luchs
    Mary Luchs
    Michelle Song
    Michelle Song
    Nina Inverso
    Nina Inverso
    Revelwood
    Revelwood
    Robert Nordhagen
    Robert Nordhagen
    Tara Byrnes
    Tara Byrnes
    Wesley DeMarco
    Wesley DeMarco

    Sign up for our newsletter

    Connect

Footer

Revelwood Overview

Revelwood helps finance organizations close, consolidate, plan, monitor and analyze business performance. As experts in solutions for the Office of Finance, we partner with best-in-breed software companies by applying best practices guidance and our pre-configured applications to help businesses achieve their full potential.

EXPERTISE

  • Workday Adaptive Planning
  • IBM Planning Analytics
  • BlackLine

ABOUT

  • Who We Are
  • What We Do
  • How We Help
  • How We Think
  • Privacy

CONNECT

Contact:

25B Vreeland Road, Suite 111 Florham Park, NJ 07932
201.984.3030
info@revelwood.com

Copyright © 2023 · Revelwood Inc. All rights reserved. Revelwood® and the Revelwood logo are registered marks of Revelwood Inc.